In this brief guide I will show you how to setup the shaper in OPNsense using the minimal number of settings and configuration. We will be using the modern fq_codel (Fair/Flow Queueing + COntrolled DELay) packet scheduler. The idea here is to maximize compatibility, however you may need to research further than this guide to tailor the settings for your network.
Connect a wired computer as close in your network topology to your modem or ONT as you can, and run an internet speedtest. Note the results from this test (it is wise to perform several tests, then work out the average). Here are my personal results we will use in this guide.

First, start by navigating to Firewall > Shaper > Pipes.
- Select the + icon to create a new pipe.
- Enable advanced mode in the top left corner.
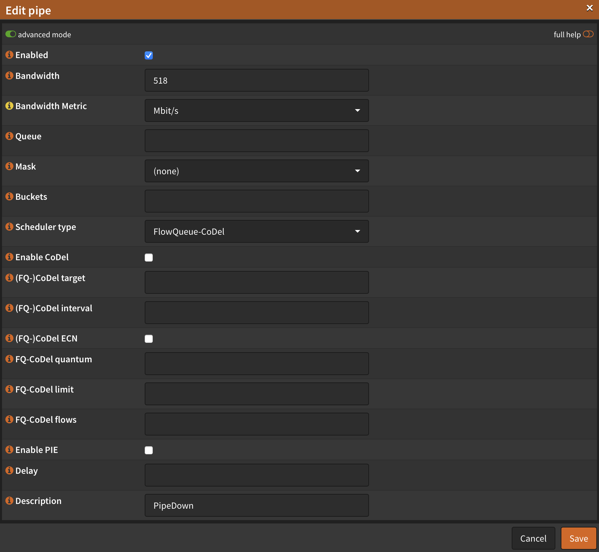
- Under Bandwidth enter in your measured download throughput, rounded down.
- Under Bandwidth Metric select Mbps.
- Under Scheduler type select FlowQueue-CoDel.
- Under Description enter PipeDown.
- Save.
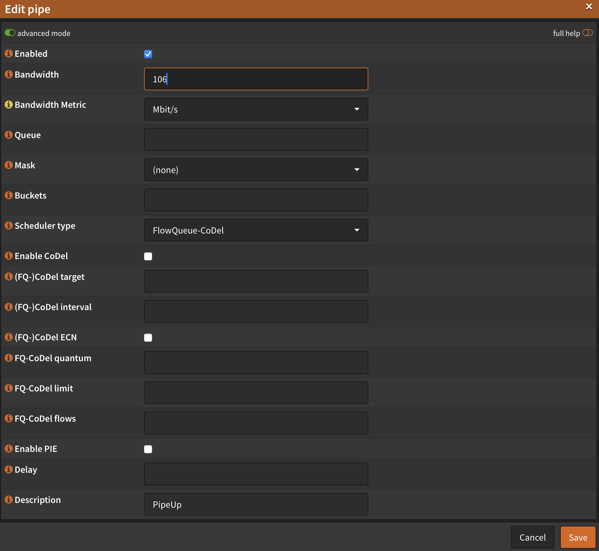
Add another, but this time enter the upstream bandwidth and name it PipeUp.
Second, navigate to Firewall > Shaper > Queues.
- Select the + icon to create a new queue.
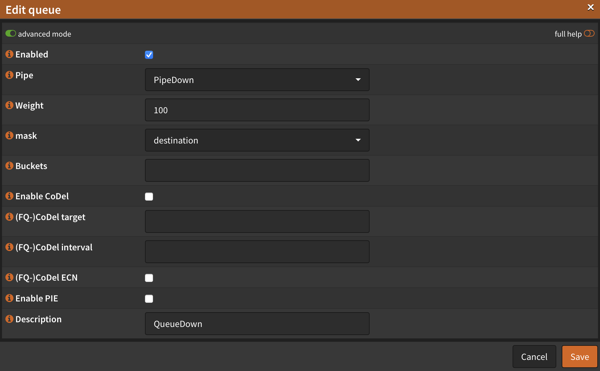
- Under Pipe select PipeDown.
- Under Mask select Destination.
- Under Description enter DownQueue.
- Save.
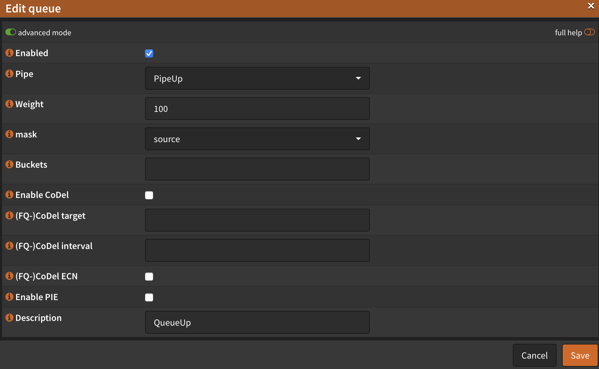
Add another, but this time select UpPipe, Source, and enter QueueUp.
Third, navigate to Firewall > Shaper > Rules.
- Select the + icon to create a new rule.
- Under Direction select in.
- Under Target select QueueDown.
- Under Description enter RuleDown.
- Save.
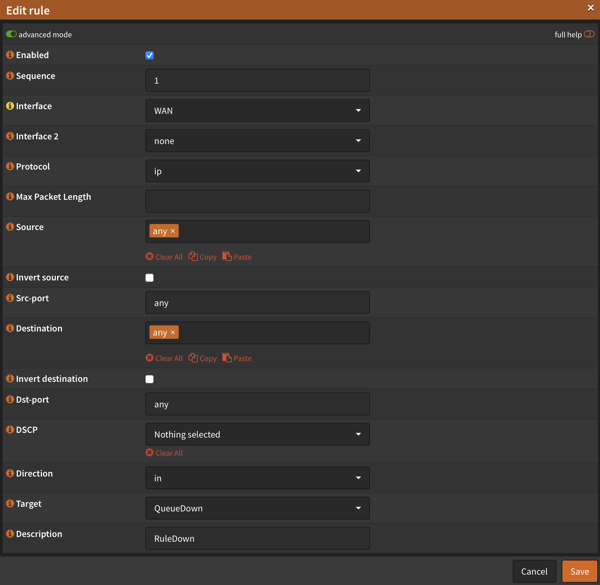
Add another, but this time select out, QueueUp, and enter RuleUp.
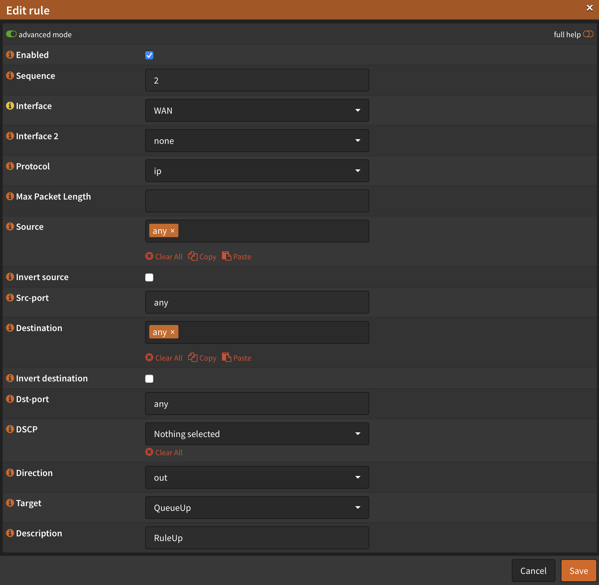
Click on Apply for the changes to take effect. You can navigate to Firewall > Shaper > Status to confirm your settings have been enabled.

On a computer that is within your local network, re-run the internet speedtest. You will notice you lose some throughput — in my case about 7-8% — in favour of consistently low latency. Here are my results.
